
Photographs are the custodians of the most precious moments in life, so they often decorate our homes, evoking pleasant memories. How much more attractive a photo will look if you put it in an original frame made with your own hands! Today we will show you 14 ways to make a photo frame with your own hands, which will become a real interior decoration or a unique creative present.
1. Cardboard photo frame
The simplest and at the same time not devoid of originality photo frame can be made of cardboard. Even a child can cope with such work!
On one sheet of cardboard, cut out a rectangular center, which should be slightly smaller than the photo. Separately prepare a cardboard rectangle larger than the picture. If you plan to put a photo frame on a leg - prepare it using the template. For a wall piece, remember to glue the string on.
Then everything is simple - on the back of the "window" we put a photo and fix it with a rectangle smeared with glue, attach the leg.
Such a frame in itself will not be of decorative value, so it must be decorated. Use colored paper, magazine clippings, or gift wrapping.


2. Frame made of branches
A wonderful eco-style photo frame will turn out if you use thin twigs and twigs to make it. It is noteworthy that the material is easy to collect just by leaving the house. Also prepare cardboard for the base, glue gun, varnish and additional decor in the form of flowers, beads, cones or ribbons.
Form a rectangular blank of dark colored cardboard or paint (the main thing is that it does not remain white). Dry twigs need to be slightly cleaned, freeing them from excess bark and cut into the same length to the size of the sides of the frame.
Now you can start glueing the twigs by slightly intertwining their ends in the corners. In conclusion, glue decorative ornaments and open the craft with varnish.


3. Photo frame made of seashells
Lingering seashells are sure to be found in any family with children. The tireless child is ready to collect tons of this material, without then finding any use for it. Take this opportunity and decorate your photo frame with shells!
The base can be a regular wooden or plastic frame. Pick up whole shells, rinse thoroughly, dry and start gluing. When the composition is finished, open the shell frame with varnish or paint.


4. Denim photo frame
A creative youth photo frame can be made from old jeans. Take a thick sheet of plywood or a rectangular wooden plank as a base. Draw on it the contours of the future photo.
Prepare the decor - cut denim ribbons of the same width, but different lengths, so that the finished rounds are of different sizes. Grease each tape with glue on one side and twist. When you collect a lot of such "details", paste over the frame with them.
After complete drying, it is necessary to carefully trim the bottoms of the outermost rounds from the inside, as well as the sides of the cardboard protruding from the sides. Now you can put your favorite photo here!


Wall key holder for the hallway: 10 beautiful ideas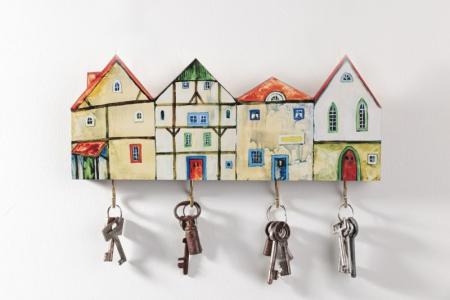
5. Country style yarn frame
You can use knitting threads to make a cute frame that looks great in a family or baby photo. You will need 70-80g of yarn of one or several colors (at your discretion) and two cardboard frames.
Each of the bases must be tightly wrapped with a thread, passing twice so that there are no voids left. Now cover the photograph with these two wrapped frames and once again go through the entire piece with the thread, fixing it in this way.
In the process of winding, you can string multi-colored beads, buttons on threads or decorate a ready-made photo frame with artificial flowers.


6. Mosaic disc frame
Iridescent DVDs are excellent material for making your own high-tech photo frames. Take some old unwanted disks and break them into small pieces.
Prepare the cardboard base and start gluing the pieces, which can be placed in a chaotic manner. When finished, let the frame dry for a few hours.
Now you need to process the gaps - use acrylic compounds in tubes or paints for stained glass painting. Don't forget about the frame edges too!


7. Culinary Photo Frame
A reliable and original design of the photo frame can be made even from salt dough. It is quite simple to create it: pour a glass of flour and half a glass of salt into a bowl, add 100 ml of water (if you want the frame to be colored, dilute the water with food coloring). Knead the dough and season it with 50 ml of vegetable oil.
The dough should "rest" for two hours, after which you can start sculpting. Place the finished product in a preheated oven and bake for two hours, not forgetting to turn it over.
If you do not paint the dough initially, you can paint the finished product after it has completely cooled. A dough photo frame will last longer if you open it with a layer of varnish.


8. Frame using decoupage technique
The name of the drawing technique sounds rather pompous, but in fact it is a simple re-gluing. To make a stylish photo frame, you will need a patterned napkin, PVA glue, a wooden or plastic base frame and varnish.
Disassemble the old frame and paint the front surface with white acrylic paint (for convenience, it is better to use a sponge), wait until it dries. Apply a napkin, dip the brush in glue and process the canvas, smoothing out any air bubbles that may have formed.
When the product dries well, you need to cut out the middle for the photo and glue the edges inward. Now you can put together your photo frame and varnish it.


9. Photo frame from the window frame
Yes, you are reading absolutely correctly - you can make a unique panel in the shabby chic style from an ordinary window frame. To do this, of course, you will need an old window frame, which you don't even need to paint - cracked paint and chips will become the "highlight" of the product.
The frame needs to be disassembled, insert one large photo or several small ones, depending on the number of windows. Previously, the pictures must be glued to a sheet of cardboard or thick paper. It is better to choose black and white photos - they will look harmoniously with your “old” luxurious frame.
Now it remains to assemble the product and find a worthy place for it on the shelf of the living room or bedroom.


10. Photo frame made of buttons
It is no secret that many housewives, sending old clothes to the landfill, cut buttons from them in the hope that they will be useful someday. Well, their time has come - decorate the frame for photos with multi-colored buttons!
Choose buttons of different sizes - this will make it easier for you to compose. Place large buttons on the frame first, and then fill in the gaps with small ones. If you are satisfied with the result obtained, proceed with gluing, fixing each button in turn.
If you make a base frame yourself from cardboard, it is better to glue it over with colored paper beforehand, because the gaps will be visible one way or another.


11. The original frame made of cereals
A simple and affordable option for making a photo frame with your own hands is to make it using cereals or grains. You will also need thick cardboard, some paper, glue and paint.
Create a frame from cardboard or plywood, and cover the edges with paper for beauty. Paint the workpiece. Now you can start decorating.
Place the frame on the support so that it is in a horizontal position.Densely treat the surface with glue to get a decent layer and sprinkle with cereals on top. The miracle frame is ready! To make it last longer, cover it with an additional protective varnish.


12. Retro frame from the alarm clock
An interesting idea to make a stylish photo frame, giving a second life to an old alarm clock. Disassemble the alarm clock with a screwdriver. Attach the glass to the photo and cut out the image.
Now put the whole structure back, but without the hands and clockwork. Place the picture under glass. To securely fix the photo, grease its edges with glue.
This retro-style photo frame will be a great decoration for a fireplace, bookshelf or a great gift.


13. Photo frame made of clothespins
From clothespins, you can make a cheerful sun frame, where the photos will be located in a circle. This is one of the easiest ways!
First, you need to form a circle of thick cardboard. Cut out the middle or leave it glued with a colorful picture - decide at your discretion.
Now glue the clothespins along the entire circumference so that the opening side of each of them looks up. Your wonderful photo frame is ready!


14. Elegant paper photo frame
See how easy it is to make a cute photo frame even from plain paper! For the frame, you will need a thick paper sheet. Draw the template as shown in the photo - you can print the image or redraw it by enlarging it on the monitor.
Now, following the step-by-step instructions, fold the frame, and decorate the inside with colored paper or fabric. Start decorating, but do not forget that the frame is made of paper, so you won't stick a lot of decorations on it, otherwise the product may lose its shape.
Two or three flowers or butterflies will be enough. You can complete the composition with a contrasting thread winding with a pretty trinket.


Photo gallery
Making a photo frame with your own hands is an interesting creative process that allows you to make a real masterpiece out of simple materials. Don't forget to check out our photo gallery! Here you will find even more interesting ideas that you can safely experiment with using various decorating methods.


