We all know from childhood that needles should be kept in order so that no one gets hurt about them. If embroidery or sewing is your hobby, then you need to arrange needles of different sizes and diameters. Shop plastic boxes are ugly and not very convenient. So why not make your own unique and creative pin cushion?
1. Pin cushion-bracelet in the form of a flower
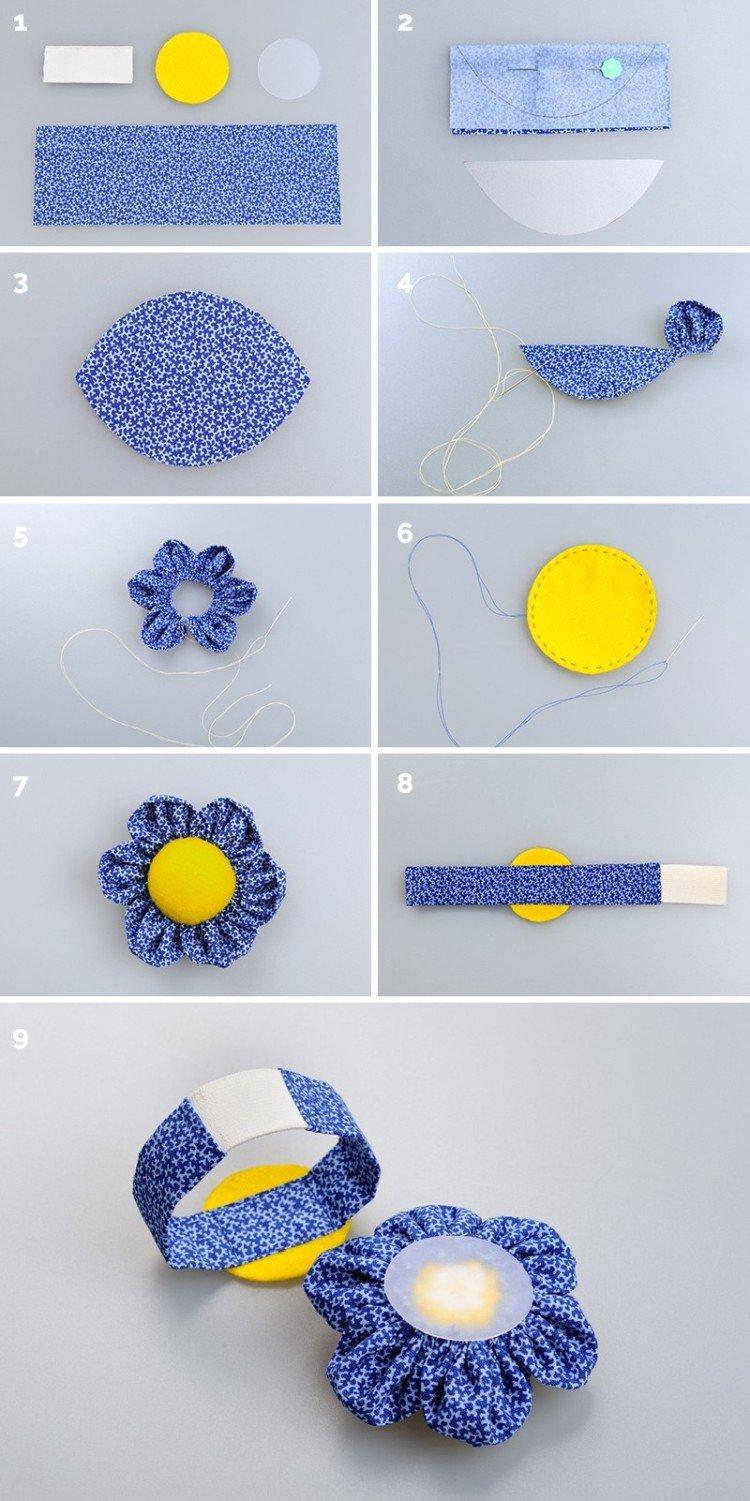
First, make yourself a bracelet from a rectangle of about 6.5x20 cm and insert a wide elastic band into it along the girth of the wrist plus 2 cm.Cut out a circle with a diameter of 5 cm from felt and sew it to the bracelet - this is a substrate for a flower.
Cut out a circle with a diameter of 8 cm out of yellow felt and sew it around the perimeter, slightly stepping back from the edge. Pull off the basting seam to make a pouch, fill it with cotton or holofiber and tighten until the end. Cut six petals 11x8 cm from dense cotton. Fold the first petal in half and draw a simple basting stitch around the perimeter. Pull it off and form a petal by hand, secure the thread and continue stringing the next one onto it. When you finish the whole chain, connect it in a ring.
Before connecting the flower to the bracelet, take thick cardboard or thin plastic (even an unnecessary water bottle will do). Cut out a circle with a diameter of 4 cm and put it between the substrate and the flower, and only then sew everything together. This layer will protect you from accidental pricks with needles and pins.
2. Pincushion pumpkin
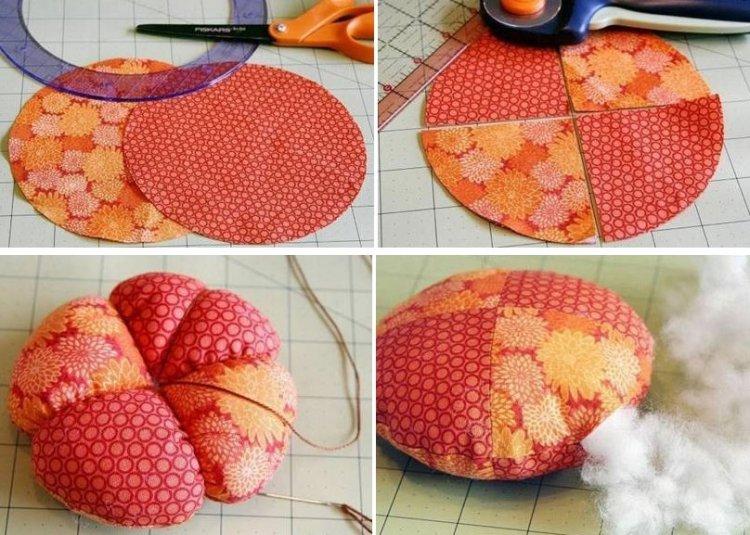
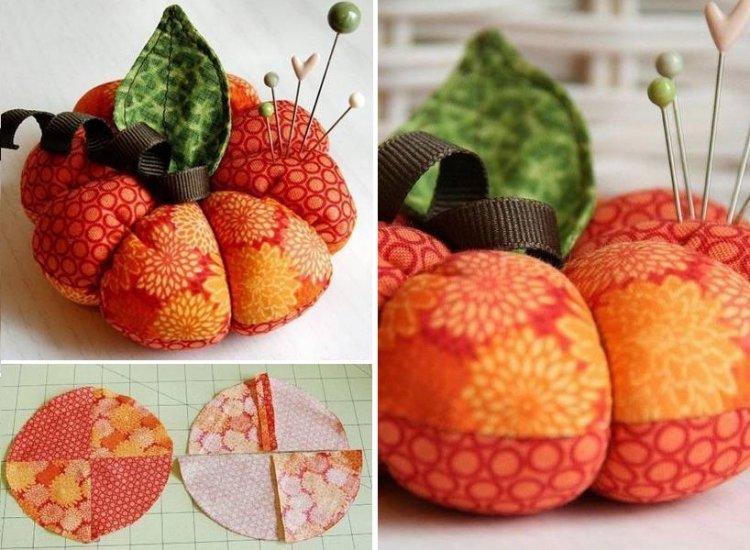
If you have a piece of bright orange cotton, it will make a great pumpkin. It is even better if there are two cuts in the same scale, but with different patterns. They will need a brown ribbon or lace, green felt or fabric and matching threads.
Cut out two identical orange circles and divide them into even quarters. Combine them so that the patterns alternate in each half. Sew the quarters, iron the seams well, join the circles and stitch, leaving a small gap for eversion.
Turn the circle out, fill it with holofiber and carefully sew up the remaining incision. To make expressive slices, lay a decorative stitch with a dense thread and tighten the edges - you get eight volumetric sections. All that remains is to cut and sew a leaf with a pumpkin spine ribbon!
3. Pin cushion
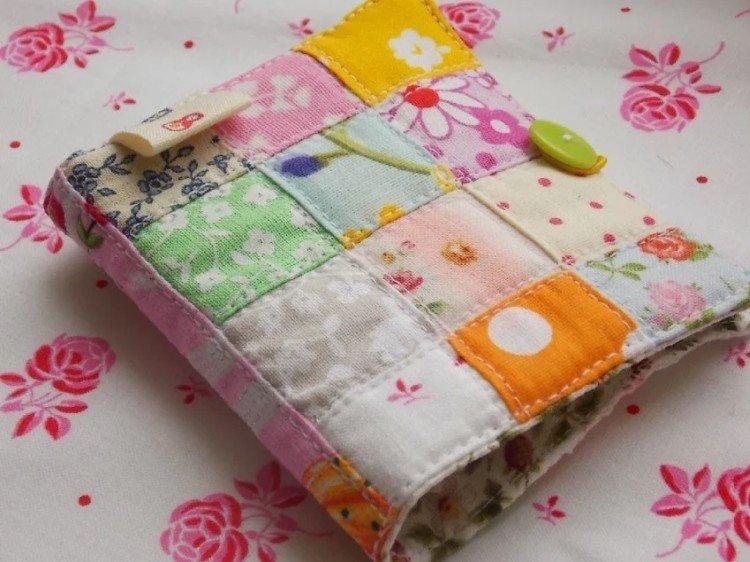
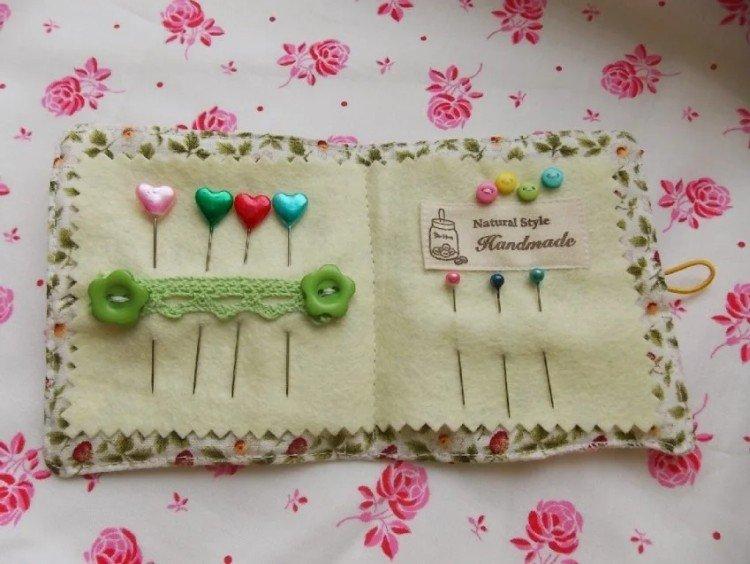
To arrange needles that are different in size or purpose, a needle bed-book will do. Use felt or other similar nonwoven fabric - then you don't have to process the edges. Although you can sew multi-colored chintz fragments in the patchwork style.
Cut out a 12x19 cm rectangle for the cover and another one or two centimeter smaller for the pages. Fold the rectangles on top of each other, bend them in half and stitch them in the middle. Fold the book through the cotton backing for a tighter hold. Decorate the cover, make a clasp or string ties, and sort the needles into pages.
4. Needle cushion-mannequin
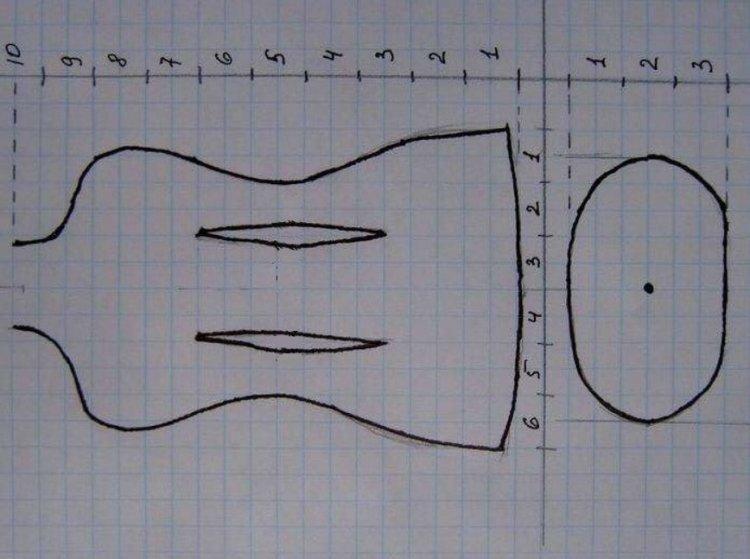
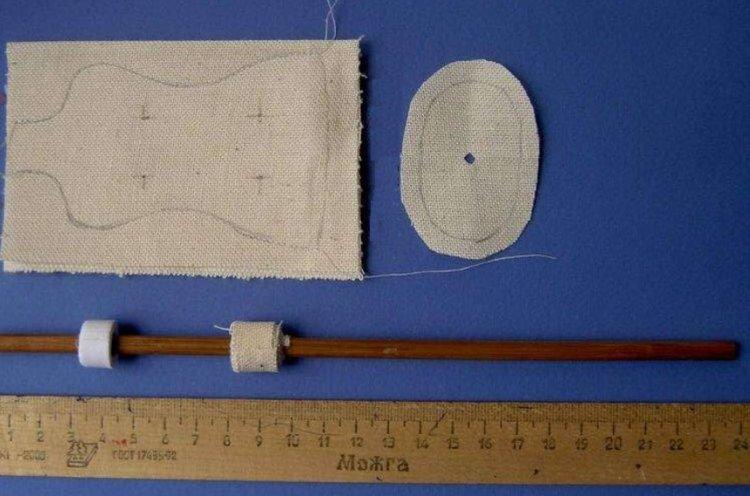
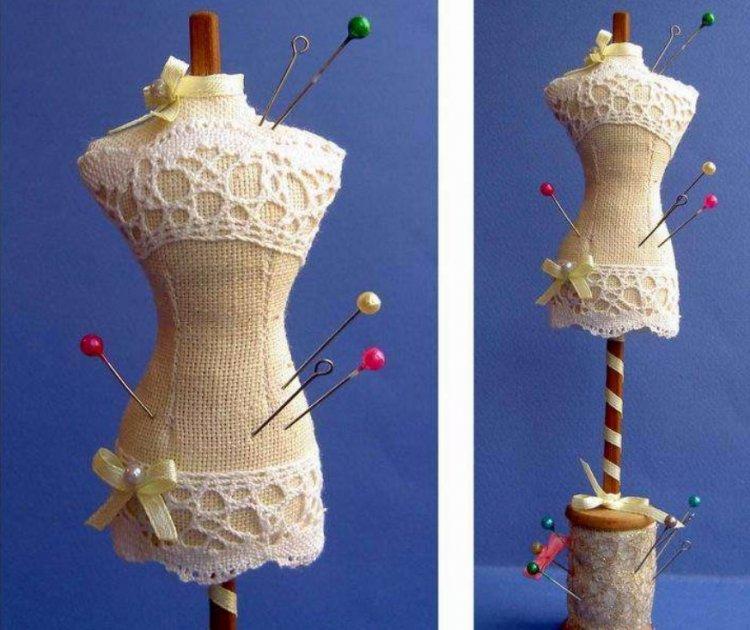
If you want an unusual needle cushion in the form of a mannequin, redraw the pattern, keeping the proportions in centimeters. Take a Japanese chopstick or hair chopstick and roll up a cloth roll over your chest and hips. Saturate the strip with PVA glue and then let it dry so that the winding does not slip.
Sew the sides, form the darts and cut the notches along the allowances. Pass the stick inside and pull the dummy collar so that it fits snugly against it and does not fidget. Fill the mannequin with holofiber and carefully sew the bottom around the perimeter.
For decoration, ribbons, lace, buttons, flowers and any other small decor are suitable. For stability, glue the bottom of the stick into an old wooden spool and decorate it in the same style as the needle bar itself.
5. Needle cushion-elephant
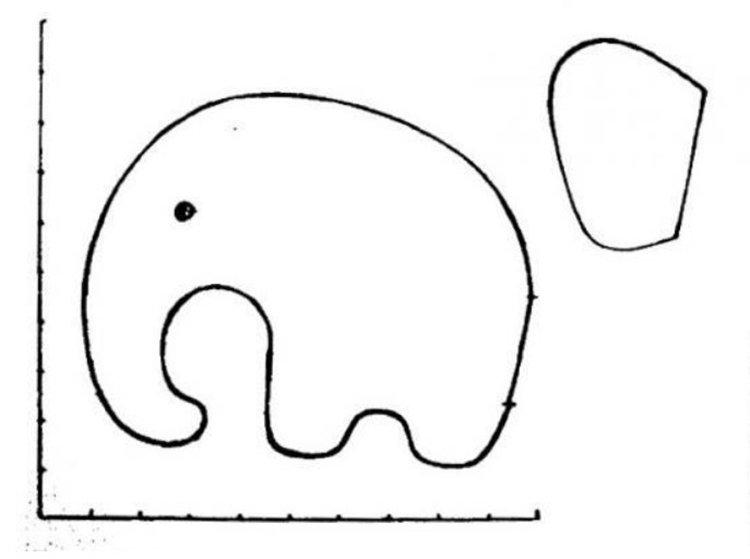
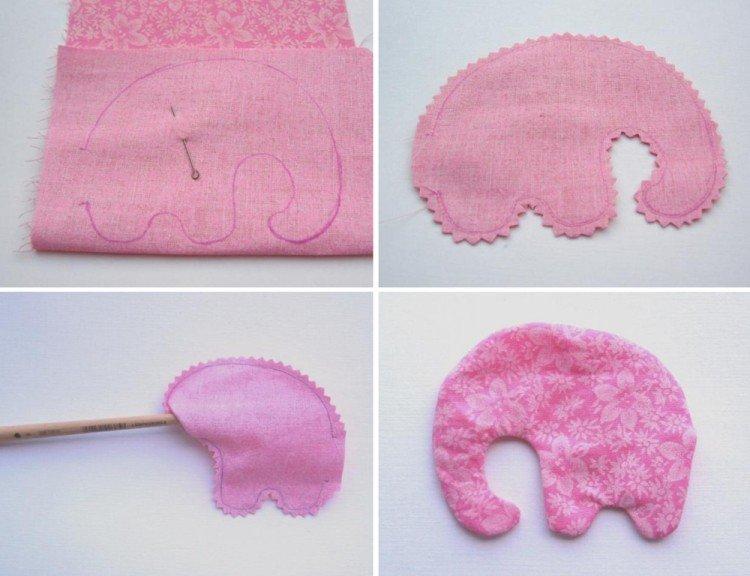
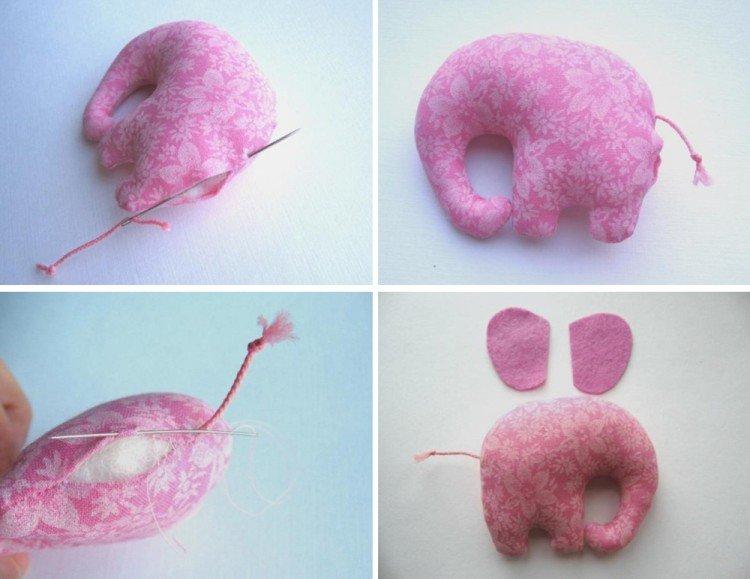
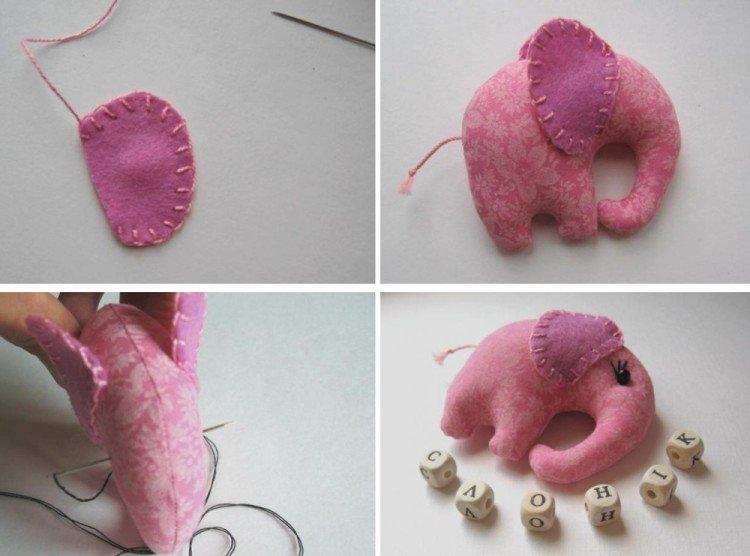
To make a pincushion in the shape of a cute elephant, you will need fabric, a piece of felt, matching lace, eye beads and filler. Fold the fabric in half and transfer the main part, keeping the proportions.Along the entire perimeter of the elephant, add small allowances for seams - 0.5-1 cm each.
Cut out the workpiece, sew around the perimeter and leave a small area to turn out. If you have zigzag scissors, use them on seam allowances so the edges tend to run out less. Fill the needle bar gradually, starting from the trunk and compacting the filler with a thin stick or pencil.
Take a tight lace or thick thread to match, tie knots on both sides and sew the tail in place. Cut out the ears from pieces of felt, sweep them around the perimeter and sew them to the body with the same seam. Make the elephant eyes - and the funny pincushion is ready!
6. Needle case
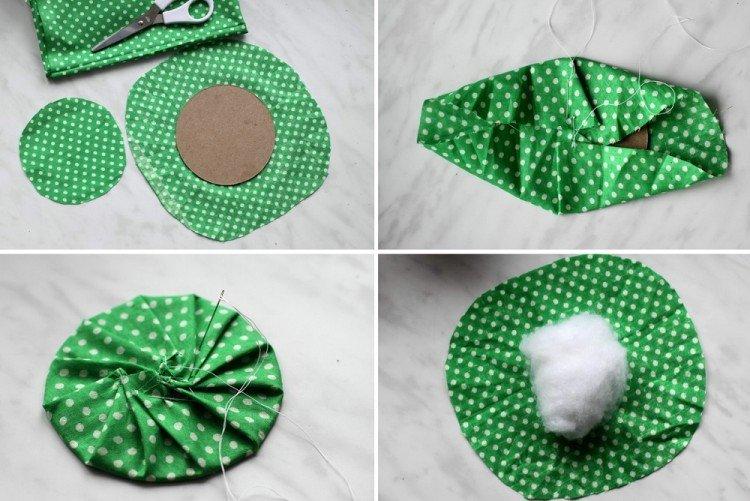
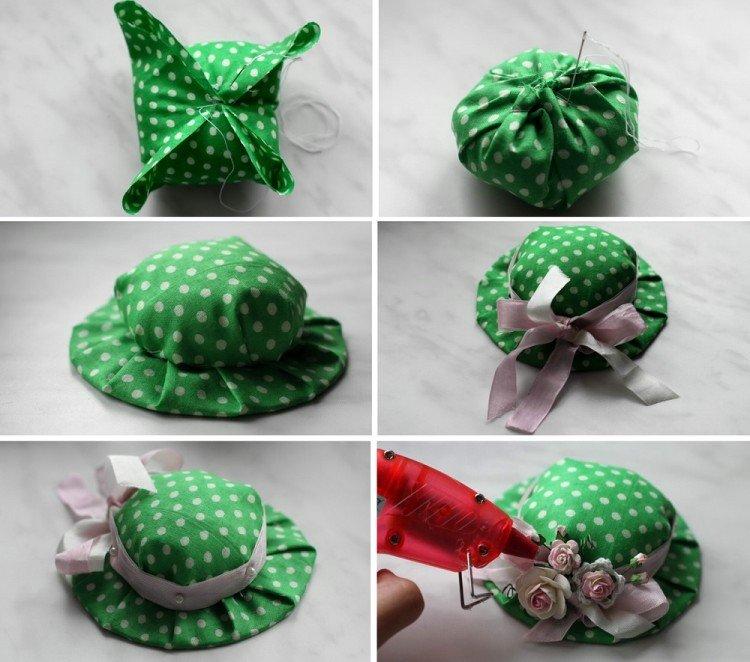
If you have a small piece of bright cotton and a lot of small decorative tinsel, make a pincushion in the shape of an elegant hat. To begin with, cut out a 10-centimeter circle from cardboard, and 14 and 22 cm from fabric. Cover the cardboard base with a cloth and a stitch, as shown in the photo - these will be the sides of the cap.
Fill the second circle with holofiber or cotton wool and sew along the edges, forming a neat bag. Connect the details of the cap, sew with a neat seam and wrap the joint with tape. It can be tied tightly or simply glued onto a glue gun. In the same way, attach decorative bows, buttons, flowers and other little things.
