
This type of coating is often chosen for its good density, sag and fade resistance, excellent paint compatibility and of course, beautiful design. In this article, we will tell you in detail how to glue non-woven wallpaper, prepare the surface before cosmetic repairs and how to take care of the material after all the work!
How to glue non-woven wallpaper: room preparation
The first step is to remove the old coating. For plain paper wallpapers, you can use a spray bottle with plain water to make it easier to pull away from the walls. For other types of surfaces, you will need to use a spatula or special scraper.
Make sure the work area is free of cracks or significant irregularities. Otherwise, putty them, and then treat the walls with a primer and sandpaper. If the wallpaper is very thick or there is a high temperature in the room, it is highly advisable to additionally apply liquid glue to the walls an hour or two before the main work.
On the day of gluing (+ day after), the windows must be closed. It is also better to leave the wallpaper in the workroom for a day or two before repairing so that a balance of temperature and humidity is formed. The floor and ceiling need to be repaired before working on the walls.

Surface preparation before gluing wallpaper for painting
For such a coating, it is not necessary to carefully and scrupulously process the walls. It's okay if small stains remain or the tone of the working surface differs in places. After the final painting, all inaccuracies will disappear. If the wallpaper is very thin, add a small amount of coloring agent to the glue, which you will then apply to the decorative strips.

Wall treatment before gluing wallpaper with ready-made decor
This coating requires a thorough study of the working area. Otherwise, dirt, cracks, darkening will then show through. Achieve an even light color to the walls before proceeding with the further renovation phase.

How to glue wallpaper: detailed instructions and tips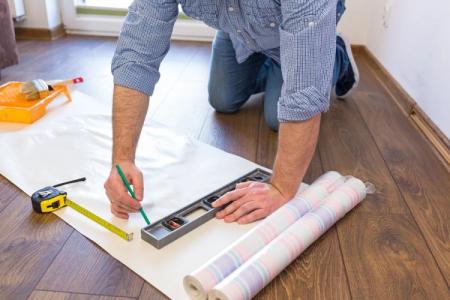
How to choose an adhesive for non-woven wallpaper
Buy a solution designed specifically for this type of coating - it can be found at any hardware store. Give preference to dry mixtures, since it is not always convenient to work with ready-made products: they are quickly absorbed, and therefore require prompt action.
When preparing the sticky mass, follow the instructions on the package, but in any case, make sure that there are no lumps as a result. Look for an anti-fungal adhesive for double benefits.

What tools will you need to work
In addition to the rolls themselves and a container with glue, you will also definitely need a plumb line or level, a simple pencil, a knife and different types of spatulas - with soft and sharp edges. Also grab a damp cloth or sponge to wipe off excess sticky mixture.
Instead of a wallpaper spatula, a soft roller is also suitable - it is needed to smooth out already glued strips. Don't forget the wall tape and non-woven strips.

Wall markings
It is better to start work from the corner (near the window), making an indent from it by the width of the strip, and move clockwise. The main thing is to issue the correct measurements and labels for the first strip of wallpaper. The following ones must be glued strictly along the joint, because the non-woven base does not stretch and does not settle. If it is more convenient for you, for clarity and accuracy, you can draw the entire wall, having previously learned the width of the flap.
Fix a plumb line or a building level, and then draw a straight line with a pencil without pressure. For this, many additionally use a ruler, an even and long bar or even a tape measure. You do not need to leave a mark for the entire height of the surface. It is enough to draw a meter line closer to the center of the wall.

How to choose wallpaper for the living room: 85 ideas (photo)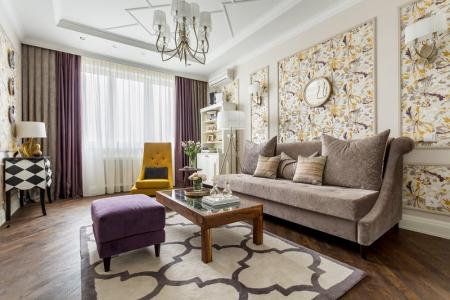
How to properly cut wallpaper scraps
Much depends on the pattern of the coating: the drawings will have to be correctly combined. Place the free edge of the roll against the junction of the ceiling with the wall and unwind it to the floor. Add 3-5 cm to the resulting length, bend in the right place, and then cut along the fold with a sharp knife. Additional centimeters are needed in case of uneven wall heights.
If there is a pattern on the wallpaper, you will have to apply each strip to the neighboring ones and measure it out on a new one so that the pattern matches. Therefore, we recommend that you do not cut several strips at once, but prepare a maximum of two strips at a time. In this case, it is better to leave additional length for both the top and bottom edges.

How to glue non-woven strips
The glue is diluted, the surface is processed, dried and marked, the wallpaper is cut - now you can start the main work. Apply the adhesive mass liberally to the wall (wider than the prepared canvas) and distribute it evenly, while smearing the non-woven flaps themselves is not necessary.
Carefully attach and match the first strip to the marked line. Fix the center of the tape, and, moving from it to the edges, glue the rest of the panel. Remove air and excess sticky solution to the sides with a wallpaper roller or spatula (with a soft edge). If the solution gets on the front of the decor, immediately wipe it with a damp cloth - the surface will not suffer from this, and you will avoid stains on the wallpaper after drying.
To remove excess parts, attach a pointed spatula to the joint between the wall and the ceiling or floor and cut off unnecessary centimeters along the line of the tip with a knife. Place the next flaps exactly at the junction with the previous ones.

Gluing corners
This zone is extremely rarely even, so it often turns out that the wallpaper here looks clumsy, wrinkled and sloppy, or even worse - it requires individual pieces to be glued. To prevent this from happening, glue the strips with an overlap: both flaps should cover the corner, slightly going into the adjacent wall, and overlap each other.
Place a sharp-edged trowel straight into the center of the corner, holding the handle firmly against the left wall. Cut two strips at once with a knife along the line of the tip, gradually rearranging the spatula. Remove excess pieces of material, grease the edges of the whole strips again and smooth them gently from the wall to the corner.

Wallpaper for the hallway: 80 photos and beautiful solutions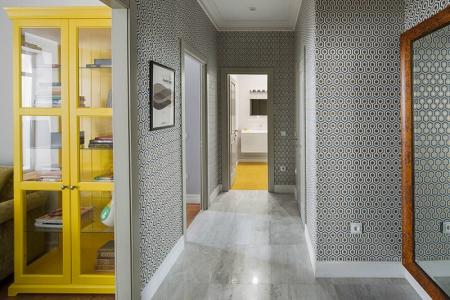
How to glue wallpaper near sockets and switches
Before work, turn off the electricity and remove the upper large attachments, leaving only the connectors in the wall. Stick the desired flap in the standard way, let it dry, then feel for the holes and make cruciform incisions. When the entire wall is completely dry, it will be possible to cut off unnecessary pieces with a knife or scissors and reinstall the covers of switches and sockets.

Caring for non-woven wallpaper after gluing
At this stage, the coating is checked for bubbles and loose edges. In the case of the latter, it is enough to grease the wall with a small brush and carefully smooth out the corners that have gone away.
The air closer to the center of the web requires a different approach: Put the remaining glue into a large syringe, carefully pierce the bubble with the needle, and slowly pour in the contents. Smooth with a wallpaper spatula and wipe off excess with a damp washcloth.
