
Even the most beloved cabinets wear down, scratch or fade over time. The paint peels off, the wood dries, and the varnish becomes cloudy. But what if we turn that from a disadvantage to a feature? Te6e will not have to sadly say goodbye to your favorite furniture and spend money on new ones! And we are ready to help you with interesting ideas and inspiration for new achievements!
1. Brushing
The easiest way to update an old wardrobe is, oddly enough, aging. This furniture is especially good in luxurious classic interiors, provence, loft and any other styles that gravitate towards retro.
Choose the right spots for scuffs to look natural. The fastest way is that furniture is rubbed where the base is under load, or it is constantly touched: edges, corners, handles, countertops, protruding relief.
Mechanical abrasions are created using the brushing technology: the surface is treated with a stiff metal brush, which removes paint and removes soft fibers. The technology is good for cabinets made of larch, pine, ash or oak.


2. Craquelure
Craquelure is the creation of a fine mesh of cracks on a surface using paint and a special varnish. It can be of two types: one-step - when the base or bottom layer peeps out from under the paint cracks; two-step - when there is another decorative coating or image under the craquelure.
In the simplest technology, the surface of the cabinet is first covered with a dark pigment, on top - with a colored or contrasting paint. And after drying, craquelure varnish is applied, which provokes cracking. This option is suitable not only for wood, but also for cabinets made of any other materials.


3. Elegant scuffs
If brushing looks too rough for your taste, there are more graceful aging techniques. Pay attention to this if your interior is designed in Provence, boho or shabby chic style.
First, a colored paint of a saturated or pastel shade is applied to the surface - but always noticeable. After drying, it is densely rubbed with paraffin or wax, and then a second layer of light paint is applied.
The wax is removed with ordinary sandpaper, and the bottom layer appears under the light coating. Delicate aging looks especially good in milky, beige, cream, olive, lavender, linen, pistachio and pale pink bases.


4. Spraying
You can radically transform old furniture with ordinary decorative staining. And for this it is not necessary to be able to draw, because now abstraction, geometry and simplicity are in vogue.
A bright and creative accent in a modern interior will be an artistically splattered wardrobe, as if it had just come from a painter's workshop. You only need brushes, paints, water and newspaper or oilcloth to cover your workplace.
Choose the spraying technology that you like best: just shake the brush onto the surface, paint with a toothbrush or toothpick, knock small drops from a wide brush. Until the paint dries, the result can always be corrected, the more negligence here is a trick, not a mistake. And in the end, cover the cabinet with varnish to save your efforts.

DIY old table decor: 14 easy ideas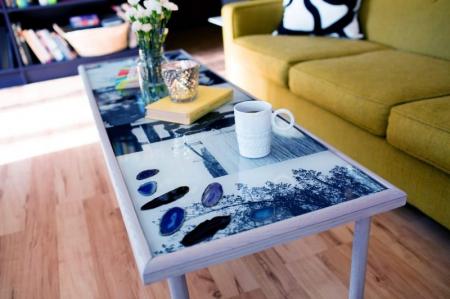
5. Glazing
Glazing is another artistic technique, which boils down to the fact that the bottom layer of paint shines through the translucent top one. The result is complex iridescent shades that play interestingly in the light.
The advantage of the technology is that you can use almost any paint: oil, acrylic, watercolor, even strong tea. Dilute acrylic with water to the desired shade and consistency and apply it with a sponge or synthetic brush.Glazing does not imply a dense uniform coverage; in fact, it is just tinting.


6. Staining
Stain is a tinting liquid that allows you to change the shade of the wood, but completely preserve its texture. Apply it strictly parallel to the fibers, and paint over with several coats of varnish or pearlescent glaze.
Soft fibers absorb the dye composition more strongly, and from dense fibers it wears off naturally. If you want to make the texture even more expressive, repeat the process several times. In order not to miss the result, first try the stain on the part of the cabinet where it is not visible.


7. Decoupage
Simple and affordable technology with a minimum of tools and consumables has won the love of decorators around the world. In fact, this is almost an applique, for which paper napkins with drawings or special blanks are suitable.
Thoroughly sand and level the substrate to ensure that the surface is completely smooth. If you are decorating a metal or glass shelf, wash and degrease it.
If necessary, you can first paint the cabinet with acrylic paint, but then wait until it dries completely. Then apply a weak solution of PVA with water to the surface and spread the top layer of napkins with a pattern on it. On top, all this is again covered with diluted PVA, and after drying - with a transparent varnish for smoothness and durability.


8. Patination
Patina is a characteristic old plaque that occurs when bronze or copper is oxidized. Its natural color is greenish brown, but other options, including colored ones, are used in decoration.
Apply bituminous varnish to the base and immediately wipe the surface so that it remains only in the relief and recesses. And on top, cover the cabinet with a special shellac varnish, which at the same time provides resistance to scratches and damage.
The shellac lacquer itself gives the surface a shade of old copper or gold. And at the same time, it emphasizes the woody texture well, therefore it is often used to patinate wooden furniture on its own.

Acrylic patina is a regular diluted acrylic paint in a suitable shade. It is spilled on the embossed areas in the same way, and all unnecessary is erased with a clean rag.
Wax patina is a separate compound that is rubbed over the surface, giving it a shade and a characteristic satin sheen.
The chemical patina looks the most natural, because it simply speeds up natural processes hundreds of times. Paint the cabinet with finely dispersed metal particles and apply a special oxidizer on top.

10 cool ideas on how to decorate an apartment for the New Year
9. Etching
Etching is a more complex chemical process than staining and therefore requires careful preparation and selection of reagents. But this technology is good for hardwood cabinets. This way you can give them a rich, deep shade and emphasize the texture.
In the simplest home recipes, decoctions from leaves, bark, tea, coffee, and potassium permanganate are used. But chemical components are more effective, which can be purchased immediately with instructions for applying and indicating the exposure time for different types of wood.

For example, 1% copper sulfate will help to give oak a brown hue, gray-lilac - 1% iron, and blue-black - 4-5% iron. You can paint a birch in dark red with zinc sulfate, and greenish-yellow with potassium chromium peak.
Calcium chloride gives a coffee shade to light breeds, and Epsom salt gives an unusual purple hue. And different combinations of these reagents create olive, lilac and golden tones.

10. Dry brush
Dry brushing is another technique that decorators have learned from painters to elegantly age old cabinets for classic interiors. Put some paint on a flat synthetic brush, scrape off the excess on a rag or paper, then brush over the base.
Do not press too hard, but lightly traverse corners, seams and protrusions. The hairs of the brush do not leave continuous lines, and the result is not a dense coating, but as if scratched.


11. Epoxy resin
Epoxy hardens rapidly outdoors to create a beautiful translucent finish. By itself, it gives a golden or amber hue, or creates the effect of glass or ice.
Deep cracks or noticeable defects on the surface of the cabinet can be covered with colored sand, small shells or any other decorations - and filled with resin over the top. And small cracks literally come to life if you add luminescent powder to the epoxy.


12. Self-adhesive film
If you don't want to mess with paint, varnish and resin, there is an even simpler solution - a decorative film. There are many collections in stores, from imitations of other materials to photo printing, textured, luminous and mirror coatings.
First mark the film and cut it, and then glue it like scotch tape, slowly and gently pressing it to the base and expelling the bubbles. The main nuance is to carefully level the surface of the cabinet in advance, otherwise the film will emphasize all defects.

10 best ideas on how to decorate a room for the New Year
13. Stencils
If you still want to paint a wardrobe, but you do not have enough skills, use stencils. You can print and cut them yourself, or you can buy them ready-made in an art store.
Surface preparation is the same as for any other painting: sanding, sanding, base coat. Apply a light marking on top with a pencil so that the drawing does not shift during work. Secure the stencil to the surface with masking tape so that it does not fidget - and start drawing.
If you want - take the paint in a spray can, but then take care of additional surface protection. Instead of stencils, you can use old tulle, unnecessary openwork fabric, and any other suitable materials.


14. Upholstery
An interesting and non-trivial decoration of the old wardrobe is the upholstery with another material. But this should be the most ordinary wardrobe with a simple shape and without embossed decor. Instead of a dirty fabric that cannot be removed, use dermantine, leatherette and their variations for upholstery.
For fastening the canvas, ordinary glue is suitable - the main thing is that there are no bruises and air bubbles. Decorate the edges, corners, ends and other areas with decorative studs and rivets. This finish will take a long time, but it will luxuriously fit into English interiors or a loft.

DIY old cabinet decor - photo ideas
These are not all the options that you can easily implement with your own hands. After all, the old closet has nothing to lose, so don't limit your imagination. And we offer a few more ideas for this!


