Decoupage is a simple and very interesting technique that will help transform anything: from a plate to a chest of drawers. Anyone can master it, regardless of age or artistic skills. This decorative applique is available for both adults and children. Especially for you, we have collected 8 step-by-step master classes for beginners!
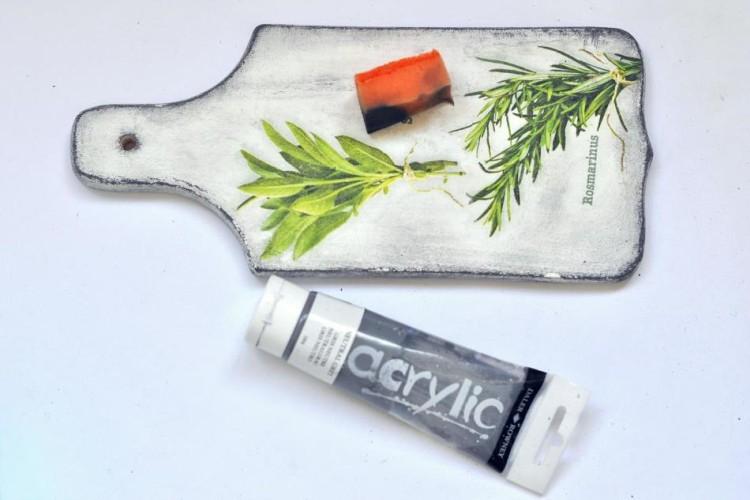
1. Decoupage cutting board
It is convenient for beginners to work with a cutting board - a smooth, even surface seems to be created for decoupage. Both plastic and wooden boards will do. You will need white acrylic paint, several colored bottles or color scheme, spray varnish and PVA.
To easily disassemble the napkin into layers, you can iron it and sprinkle it with varnish - this way it will not tear or crumble. And to easily spread and spread it on the surface, add as much water as possible. You can dry a flat surface with a hairdryer, and then varnish it, wipe off irregularities and add decor.
2. Decoupage plates
Take a regular old plate and sand it on all sides, and then degrease with alcohol and open it with primer. Paint over the surface with acrylic paint using a small sponge. Do not forget about the reverse side so that it is also beautiful.
Choose a napkin, separate the top layer with the pattern, smear it with PVA, apply and smooth out all the irregularities with a brush and glue. Make a relief in a circle using the dented inner layer of the same napkin. Immediately coat each new part with glue - let it dry right in the process.
When everything is dry, add color using colored acrylic paints and brushes. You can add some shine with a wide brush using sweeping strokes around the edges. Open the plate with clear varnish and attach a loop at the back to hang it on the wall.
3. Decoupage bottles in the style of shabby chic
You will need a simple glass bottle, degreasing alcohol, glass primer, and white acrylic. Cover the dried acrylic layer of varnish, apply a nice napkin on top and smear with PVA. Choose a beautiful stencil, take a small trowel and spread the putty.
Apply the filler evenly through the stencil, let dry and sand over with sandpaper. If desired, use acrylic paints, scuff wax, lace, beads and any other decor, pre-coating each layer with varnish.
4. Decoupage of the wall clock
Round base with a hole in the center, cut with white acrylic paint with a sponge. Find a suitable watch pattern: it can be special decoupage napkins or even a homemade napkin, if you're lucky. Or you can print the picture on plain paper and pre-soak the sheet in water with PVA.
Roll the drawing with a small roller to expel air and remove irregularities. Wipe off excess glue and cover the still wet print with varnish over the entire surface. Create texture with a putty or decoupage paste through a stencil. Polish all the irregularities with fine sandpaper and open again with varnish.
Add color, lace, scuffs and other embellishments as desired. Paint the reverse side and lacquer the watch completely one last time. It remains only to insert the mechanism itself inside - for example, from an old wall clock that has long lost its presentation.
5. Decoupage of glass jars
Wash regular glass jars from yogurt, tomato paste or canned food. Wipe the glass with alcohol or acetone and apply white acrylic building paint with a sponge. The sponge will create a neat, bubble-free, streak-free finish. After that, according to the same principle, you can add a little color in certain places.
Cut out fragments from napkins and assemble the composition. Apply the elements to the glass and coat with PVA glue from the center to the edges, straightening evenly.When the drawings are dry, paint on the details, add decor and varnish everything.
6. Decoupage pencil case
A can of tea, coffee or cocoa will make a very convenient pencil case for pencils or brushes. Choose a suitable napkin size so that the design is visible and not cut off. Paint the jar with white dense paint or glue it with plain paper on PVA. Cut off the desired piece of napkin and divide it into layers - you only need the top one with a pattern.
Apply an even layer of glue to the jar and carefully wrap it in a napkin, expelling air bubbles and straightening the folds. Cut off all unnecessary, wrap the edges and coat the top again with PVA. Add color, jewelry and other little things, and when everything is dry - for reliability, cover with transparent varnish.
7. Decoupage an old stool
The first step is to chip off the old paint coat with a chisel or spatula. Then - carefully sand the entire surface and sand it with sandpaper. All that remains is to prime the stool with a special acrylic wood primer.
Paint the stool with white matte paint using a wide, stiff brush. Take various beautiful napkins, separate the top cut out interesting drawings from them and compose the composition right on the stool. Carefully cover all the patterns with PVA glue, and when it dries, apply 2-3 coats of colorless furniture varnish.
8. Decoupage chest of drawers
To refresh an old boring dresser for your interior, remove all paint from it, peel it and prime it. You will need napkins or decoupage cards, PVA, white, sandpaper, sponge and roller. Apply white paint to the entire surface in an even layer using a roller. While the paint is drying, cut the patterns out of the napkins and separate them into layers.
Sand the wood grain around the surface to create an aged furniture effect. Spread the details of the PVA napkins and put them in their places, then coat them again with glue. Complement them with curls and ornaments using colored acrylic paints and fine brushes. Open the entire cabinet with 2-3 layers of transparent varnish so that it will serve for more than one year.


