The gazebo is beautiful because it fits harmoniously into the garden and complements the exterior of the house. It is convenient, because here you can get together with your family or invite friends to relax in nature. It is also useful, because households will have more space to spend time outdoors. And to make the gazebo inexpensive - we will tell you how to make it yourself!
Material selection
To make a drawing and draw up a further action plan, first decide on the material. Think about how often you will use the gazebo and for what purpose. Consider what the house is built of and how its exterior is made, so that they are in harmony with the gazebo.
Arbor made of wood
Most of the gazebos are made of wood, because it is beautiful, lightweight and environmentally friendly. It will go well with a frame house or a timber house. With proper processing, the material is not afraid of moisture and parasites, but the impregnation will have to be periodically renewed.
Wood can be sawn, planed, carved and assembled in a variety of shapes and complexity. It is harmoniously combined with other materials - stone, glass inserts, forged elements, tiles. Finally, the wooden gazebo has a unique aroma and creates a favorable atmosphere due to the natural resins in the composition.


Metal gazebo
The main advantage of metal is reliability and durability, because it is not afraid of fungus, mold or decay. He is not afraid of rodents, insects or any other parasites. After painting, the metal structure will survive any rain, snow and wind.
A metal gazebo with glass or brick inserts will effectively complement the exterior of the house in a modern style. The finished frame can be glazed if you need a full-fledged indoor space. Be sure to prime the metal and welds several times.


Brick gazebo
The brick is suitable for large-scale, dimensional and sturdy structures. The same brick gazebo on a reinforced foundation is best suited to a brick house. It can be made completely covered and glazed, with an oven or built-in barbecue.
It is more difficult and longer to work with bricks, but this pays off in full due to the durability of the building. In the future, it does not require any treatment from moisture and pests, or cleaning from corrosion. And the brick is not afraid of the wind and does not burn, so you can not be afraid to light the brazier in any weather.


PVC gazebo
Plastic is a very cheap and unpretentious material that does not require additional protection. Modern species easily tolerate wintering outdoors and do not crack from frost and heat. But it is not environmentally friendly, not too durable and requires an auxiliary metal frame.
A PVC gazebo is a temporary seasonal option that is not adapted to serious stress. It is dangerous to take out the barbecue there and you need to choose the lightest furniture possible. But you can make such a gazebo literally in a day.


Gazebo with or without floor
The gazebos are mounted on the ground and on the foundation, depending on the materials and purpose. For example, plastic is placed only on the ground, and heavy brick is placed only on a prepared base. But with wood and metal there are options in which we will now figure it out.
If you are installing the gazebo directly on the ground, be sure to protect it from moisture. Otherwise, the wood will rot, and the iron will rust, because wet soil is aggressive.

For light frame structures, a columnar foundation made of rubble or brick is suitable. You can use ready-made foundation blocks - it's even faster and easier. But for a major stone or brick building, you will have to fill in a strip foundation with a depth of 20-30 cm.
Lay boards on the floor, but first lay a layer of waterproofing and foam. Frost-resistant floor tiles will be more durable and reliable. In an open gazebo, make a small slope over the edge so that moisture rolls to the ground and does not accumulate on the floor.

Hosta (70 photos): planting and care, growing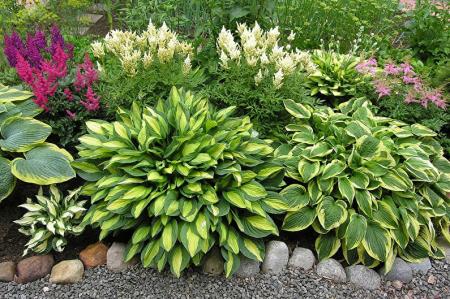
Frame and frameless gazebos
The frame gazebo is made on a frame made of metal, wooden beams or PVC profiles. It can be sheathed with wood paneling, bamboo, tempered glass, polycarbonate, corrugated board or even fabric. Temporary greenhouses are built according to the same principle, only they are covered with PVC film.
A frameless gazebo is a capital structure on the same capital foundation. In addition to bricks, you can use large ceramic blocks or foam blocks. Over the walls, they are sheathed with artificial stone or decorative tiles.


Gazebo with barbecue
You can put an ordinary portable metal brazier in the gazebo - they can be easily taken out into the street in good weather. More functional and sturdy - built-in barbecues, which are used instead of a stove or fireplace. In a closed and semi-closed gazebo, a chimney is definitely needed, but for an open frame, there is enough wind.


Garden furniture from pallets for summer cottages (60 photos)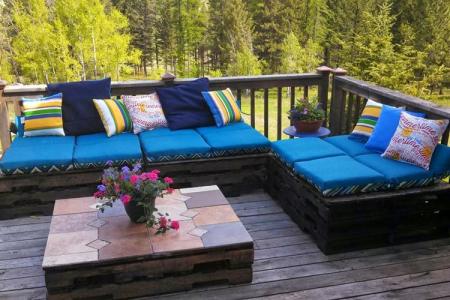
Gazebo roof
The choice of roof depends on the complexity and shape of the structure. For example, for the simplest open gazebo, a classic gable roof is suitable. Square structures with a hipped roof look interesting. And if the gazebo is adjacent to the wall of the house, pay attention to the lean-to solutions.
For pentagonal, hexagonal and octagonal buildings, a hipped roof is best suited. It is more difficult to make, but it looks very neat. Basically, you need to calculate the slope and carefully connect the rafters at the center point.
Polycarbonate sheets are used to make the roof rounded, concave or curved. They can be shaped and bent without edges, experimenting with colors and transparency. For such a roof, a welded frame made of bent metal pipes is needed.


Stages of building a gazebo
According to statistics, most often gazebos are built of wood, because you can cope with it without experience and special tools. Working with metal requires skills, and bricks are long and difficult. Therefore, we will take a closer look at a wooden structure from a bar.
Drawing
Before starting work, be sure to make at least a schematic drawing with all dimensions. Choose a suitable plan on the Internet, order it from professionals or draw it yourself - it's not difficult.


Site preparation
Choose the area on which the gazebo will stand and mark it with pegs and string. Remove the top fertile soil layer, because organic matter will cause the tree to rot. Fill loose loose soil with broken brick or rubble, and sand on top. It is better to cover clay soil with clay and tamp it.

Foundation construction
Once again tamp the pillow and place the concrete foundation blocks on top of it. You can make brick posts, but it will take much longer, because they still need to be strengthened. The step between the blocks is up to 2 meters, depending on the thickness of the material for the frame.
With each step, check the level so that all the support columns are in the same plane. Lay a waterproofing layer on top and install the bars for the lower strapping. Reinforce the frame with metal corners to make the structure more stable during bad weather.

Installing the frame
First you need to install vertical support posts - strictly perpendicular to the foundation. They must be in the corners, on both sides of the entrance and above the foundation posts. When installing, use slanting strips and reinforce all joints with metal corners.
The next step is a strapping on top, which completely repeats the bottom one and is attached according to the same principle. Then check all levels, distances and right angles again. Place the harness in the middle at the level to which the lower skin will go.

Roof arrangement
You will have to assemble the rafter system, depending on the type of roof you choose. In fact, these are triangles reinforced with a horizontal crossbar, which are attached to the upper harness with nails. To make a roof with an overhang, a small recess is cut out in the rafters, which will stand on the support.
After installation, re-check the levels, angles and secure fit. Under the corrugated board or slate, an ordinary lathing is enough, and under a soft roof, a continuous sheathing is needed so that it does not sag.


Decorating and decorating
Planks are best for sheathing the bottom of a wooden gazebo. Together with the outdoor ones, treat them with an antiseptic and cover them with a stain or special paint. It must be for the tree and the street in order to protect the structure from precipitation.


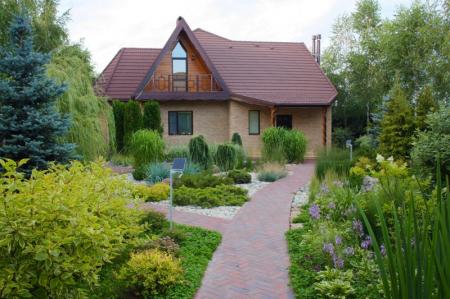
Landscaping of a summer cottage: 100 beautiful ideas