To date, the candlestick is assigned not only a functional role in the interior, but also an aesthetic one. Such a seemingly small thing is able to create a very special atmosphere, fill the room with a unique home comfort and become an original decorative element. Although the counters of modern stores offer a huge selection of these wonderful products, a handmade candlestick will bring much more joy and emotion to its owners!
DIY wooden candlesticks
Wood is the most beautiful and ecological material with a natural individual pattern. It's easy to get it just by going for a walk in the nearest park or forest. Another advantage of the tree is its malleability to processing, therefore, home craftsmen often choose it for the manufacture of various crafts.
Original bar candlestick
One of the easiest ways is to make a candlestick with your own hands from a bar, although even a small log, a thick board, and even a crossbar from a wooden mop will do.
It is better to choose a wider bar - then the candlestick will turn out to be more stable. For work, you will also need a drill and a nozzle for making small holes (the diameter must be selected for the thickness of the candles). To mark the holes, you will need a tape measure and a pencil. Also, do not forget about the decor - the finished product will need to be treated with an antiseptic, as well as painted or varnished, stained (at your discretion).
So, looking at the bar, immediately decide how many candles will be located on it, make a markup, mark the centers of the holes for the candles with dots. Next, we cut out holes with a drill and a drill, 1-2 cm deep. The depth should be determined depending on the thickness of the log and the height of the candles - for tall wax figures, deeper holes will be required to ensure their stability.

If the block or board is sanded, you can deliberately give it an aged effect, make small chips, or lightly tap with a hammer to create dents. The almost finished candlestick needs to be decorated - you can paint it, but in order to preserve the appearance of the wood pattern and texture, it is better to still treat it with a stain and then open it with clear varnish.
Next, let our candlestick dry thoroughly, then install the candles. When preparing for a certain celebration, for example, for the Christmas holidays, you can use additional decor in the form of fir branches, tinsel, cones.


Candlesticks made of birch branches
To make a composition of birch candlesticks, you will need thick branches or a thin trunk. The wood must be cut into pieces of different heights from 10 to 20 cm. On one of the back sides of each bar we make a hole for a candle with a special drill.
Since birch bark is quite beautiful in its natural form, you should not resort to staining it - it is better to treat the product with anti-fungus and insect repellents, and then cover it with colorless varnish. Next, the logs are arranged in a composition and candles are installed.


DIY glass candlesticks
Speaking about the manufacture of glass candlesticks, we mean the use of household glass items that are sure to be in every home: unnecessary jars, single glasses or glasses left over from old sets, bottles, etc. Each of these items can be turned into a unique stand for candles.
Beautiful wine bottle candlestick
To make such an interesting little thing, you will need an empty wine bottle, melted paraffin wax, a wick, sandpaper, and decorating supplies.The most difficult stage in making such a candlestick with your own hands will be to cut off the top of the bottle.
If you have a glass cutter in your household, this will greatly facilitate the work. We put on a rubber band for hair on the bottle, draw markings with a pencil and cut off. If there is no glass cutter, you will have to "sweat" a little: the bottle must be wrapped with a thick alcoholized thread, then the thread must be set on fire, and the bottle must be cranked to quickly spread the fire along the thread.

Then we quickly immerse the vessel in pre-prepared boiling water for a few minutes and transfer it to a bucket of ice water. From such a temperature drop, the glass should split along the line of the thread. If the walls of the bottle are rather thick, the procedure can be repeated. This is where the most difficult stage ends!
The edges of the resulting container must be properly processed with sandpaper in order to avoid cuts in the future. Now you can install the wick by fixing it with two sticks in an upright position. Next, fill in the paraffin and, when it hardens, proceed to decorate the candlestick.
You can paint it with paints, paste over with a napkin using decoupage technique, wrap it with colored paper at your discretion. Such a product can be a great gift: pack it beautifully and give it to a loved one.


Candlestick from a liter jar
Perhaps every housewife has a reserve liter jar, so you don't have to worry about making the base of a candlestick. The main task is to decorate beautifully, and there are a lot of ways.
For example, make an "autumn" candlestick. For this you need leaves. Let's clarify right away that it is better to purchase artificial ones, since it is easier to work with them. You can try to work with natural ones - beautiful leaves are harvested in autumn and slightly dried (if overdried, the material will become very fragile). It is better to knead artificial leaves in advance so that they become more obedient.

The jar must be well washed, dried and the outer surface must be degreased with alcohol. Please note that the walls of the jar should be flat, without patterns and relief.
Now you can get to work. Lubricate the outer walls of the can with a sponge, apply the leaves one by one and smooth each of them from the center to the edges, firmly pressing and expelling the air bubbles. The material can be glued in several layers, depending on what kind of light transmission you want to achieve.
The pasted over jar must be left for several hours until completely dry, and then treated with spray varnish for better fixation. Decorate the neck of the candlestick jar with a beautiful ribbon or twine, place a candle inside and enjoy the beauty of the autumn sunset at home.

Candlesticks from glasses
With glasses, you can come up with many interesting ways to make beautiful candlesticks. Most often, such products serve as an additional decoration for a festive evening, so the decor is used themed. For example, on Valentine's Day, you can place several glasses on the table, fill them with rose petals, add water, and fire up floating candles.
If you are preparing for the Christmas holidays, place the glasses upside down on the saucer. Fill the inner space with small Christmas balls, figurines of Santa Claus, Snow Maiden, snowmen, and install candles on the legs. The composition can be supplemented with spruce twigs, artificial snow or cotton wool.


How to decorate a table for the New Year 2021: beautiful table setting ideas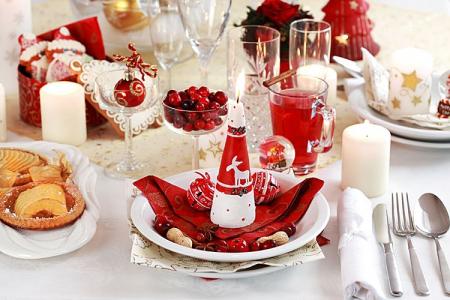
DIY polymer clay candlesticks
Polymer clay is a material that has unique properties, allowing you to create realistic objects with the smallest details. Various decorative elements, jewelry, flowers are made from it, which have high strength rates.
Candlestick-flashlight
The principle of making a small glowing polymer clay flashlight with your own hands is quite simple.First you need to come up with a layout, draw all its details on paper and cut out templates. Now we roll out the material so that the layer has a thickness of several millimeters. Next, we apply the templates of the parts and cut it out with a knife along the contour.
In this case, we are making a house flashlight, so we cut out walls with windows, a doorway and a roof for it. When all the parts are thoroughly dry, you can start gluing the structure using PVA glue.
Next, you need to close up all visible seams with a paste for modeling, and when it dries up, then carefully sand the "patches". The flashlight house is ready! All that remains is to place a small candle in it and enjoy the charming lights.


Pumpkin candlestick
A pumpkin-shaped candlestick will perfectly complement the interior of the kitchen, create the necessary mood, enlivening the atmosphere. For making, you need clay of two colors - orange and green, as well as foil, a knife, dry pastels of black and yellow colors, mold to create embossed leaves.
From the foil, you need to create a pumpkin base with a recess for a candle, and stick it tightly on all sides with orange clay. Using a pencil or any narrow stick, we create embossed stripes on the sides - the pumpkin is already quite recognizable. Next, we move on to making leaves: cut off a piece of green clay, press it against the mold and draw out the shape of a leaf with twisted edges. So we make several blanks, which we then attach to the pumpkin.
We form stems from green clay, which we place in random order, giving the composition an openwork. At the final stage, we use dry pastels, creating natural shades. Now we bake the composition in the oven, cool it down and place the candle. A beautiful homemade candlestick is ready!


10 best ideas on how to decorate a room for the New Year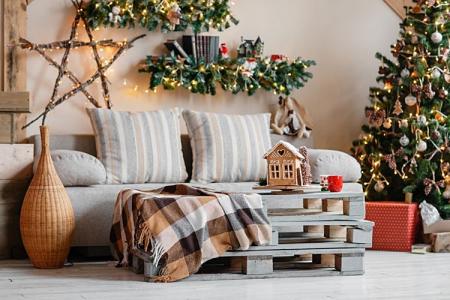
DIY candlesticks - photo ideas
Next, we invite you to look at a selection of photos, where we have collected a variety of examples and ideas for making candlesticks with your own hands. We hope they will inspire you to new masterpieces. Happy viewing!


DIY room decor: 15 original ideas