
Plasticine or polymer clay is certainly good, but what about the classic salty dough? You can prepare it in a matter of minutes and from improvised ingredients. It will definitely be 100% natural and safe for a child, even if he likes to put everything in his mouth. We are sharing with you 5 simple recipes on how to make salty sculpting dough!
1. Classic salty dough
A child can even cope with such a recipe on his own, because only two main ingredients are needed! In a glass of cold water, take one and a half glasses of salt and flour. We recommend that you add water gradually in order to get exactly the desired plastic consistency.
The dough salt should be very fine so that it dissolves well and does not remain crystals. If not, grind any homemade salt in a coffee grinder. The finished dough does not stick to the palms, and if you poke your finger into it, it smoothly and gradually regains its shape.

2. Dough with vegetable oil
Such dough does not stick to hands and surfaces at all, and no crust forms on top of the air. It is a little more flexible, but less suitable for the smallest parts. Per serving you need 100 g of salt, 200 g of flour, 100 ml of water and 30 ml of oil.
First mix the dry parts, and then gradually pour in the water so that no lumps remain. The butter should be added in portions at the very last stage, while continuing to knead the dough for elasticity. If, after adding fat, the dough begins to stick strongly, add more flour, and if it clumps, add water.

DIY bath bombs: 10 easy recipes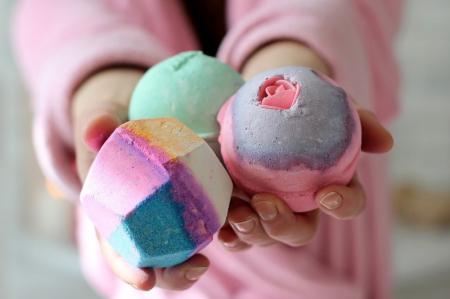
3. Boiled modeling dough
In consistency, such a dough resembles children's plasticine, which is sold in jars with special shapes and stamps. It is great for the most intricate details and even carved decor. All components in the composition are completely safe for the little ones.
In a deep saucepan, combine half a glass of salt, a glass of flour, a spoonful of oil and a spoonful of glycerin. Place the pot on the stove and gradually pour in the water very slowly, constantly stirring the mixture. The mixture is cooked for about five minutes, until it is completely homogeneous. Colorants can be added at this stage if desired.

4. Dough with natural dyes
In the case of plasticine, parents are always worried that the child will decide to taste it. Therefore, for the smallest, this is not a very safe option. But you already need to develop fine motor skills and learn the world of objects and colors!
This recipe is good because you add the dyes yourself and you know for sure that they are safe. Add 1.5-3 teaspoons of the chosen dye to a classic dough made of salt, flour and water (3: 3: 2). This can be turmeric, cocoa, or squeezed and strained beetroot juice, which must first be thickened with the same salt and flour.

5. Dough with glue
This recipe is not completely natural, so it is suitable for older children. But on the other hand, after sculpting, finished products set and dry faster. Such dough can be stored for quite a long time - up to 2 weeks, but strictly in the refrigerator and in a sealed bag or other container.
For 200 g of salt and the same amount of flour, you will need about 125 g of water, as well as a tablespoon of vegetable oil and glue. It is best to use universal wallpaper glue, but you can experiment with PVA. Before using, wrap the dough with foil and let it rest in the refrigerator for at least half an hour.
