
Scrapbooking is an interesting and versatile needlework technique for decorating albums, notebooks, postcards and envelopes. It is very beautiful, accessible even to children and does not require special expensive consumables. Revealing 8 Easy Scrapbooking Ideas for Beginners!
1. Photo collage
A shoe box makes an excellent collage for photos, postcards and memorable trinkets. Tape the entire box with brown wrapping paper, and glue a sheet of scrapbooking paper to the bottom. Make partitions from thick thick cardboard, which will be the basis for the collage.
From a cut of lace of medium thickness, fold a loop-handle for which you will hang the box on the wall. Decorate the base with butterflies, flowers, leaves and any other decor. For example, you can use small flowers using the origami technique or from foamiran.
Paste photos into your sections, use paper tape corners and frames. Decorate the collage with stickers, tapes, small volumetric figures. Cut a strip out of scrapbooking paper in a spiral and wind it tightly around a pencil - this is how you get a rose.


2. Mini-album
Take a thick sheet of paper and divide it into about 12 squares - calculate the number taking into account the sizes that you need. Cut the horizontal lines so that you get a snake - without cutting the last segments, as in the photo. Fold the blank with an accordion and connect all the pages with a strip of paper or tape. Decorate the cover with clippings, stickers, ribbons, bows and decoupage.
Take small photos and organize them on the pages the way you would like to see them. The more free space on the page, the more space for imagination. Use stickers and seals, add small details with colored pens, decorate everything with stickers and ribbons of your choice.


3. Album on rings
Decide on the size of the album and cut out the two sides of the cover from heavy packing cardboard. A regular sheet is also suitable, but for the texture, stick a piece of padding polyester of the same size on it. Cover the cover with a dense expressive fabric - canvas, linen, burlap. On each side, leave at least one centimeter for the fold, which you then glue with a sheet of paper or cover with tape.
Cut out a small square in the center of the front of the cover, take out the cardboard and synthetic winterizer, tuck it inside the edge of the fabric. Print to size the photo or picture that you insert into this window, and paste it in place. The dimensions of the square should be such as to just close the folds of the fabric.
Make neat holes for the eyelets and insert large metal rings or strings. Cut the required number of sheets, make holes in them, and assemble the album!

Decoupage for beginners step by step: 8 video lessons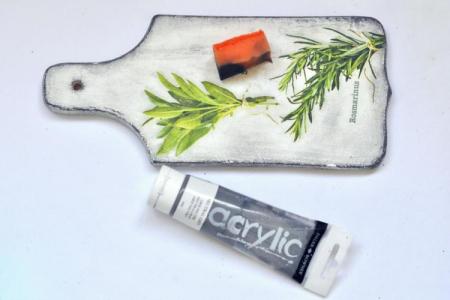
4. Bound Album
Even for binding, it is better to make pages out of cardboard if you plan to decorate them. This way they will not deform, and pens and markers will not be interrupted through and through. For gluing, cut narrow strips of 2-3 cm, and for decoration, make several bright separator pages from colored cardboard with patterns and prints.
Glue the pages onto narrow ribbons, leaving a few millimeters between them. It will be useful for you to use a voluminous decor in the album, but so that it closes normally at the same time. Glue the cover in the same way, tighten the binding with gauze tape and close it with a spine of colored paper.

5. Gift envelope for money
To give money neatly and pleasantly, for example, for a wedding, you can make an envelope with your own hands using the scrapbooking technique. To do this, you will need colored cardboard and as much cute holiday decor as possible - stamps, ribbons, stickers, artificial flowers, plastic ornaments, lace.
Fold the simplest envelope from a sheet of cardboard and glue a tie tape on double-sided tape.Scrapbook paper cuts to fit rectangles and glue them on the inside, back and front. You can sew them with a zigzag or a beautiful hand stitch - it's even more interesting. Glue butterflies, flowers, festive garlands, braid, beautiful inscriptions, and tie ribbons.

Crochet napkins: 6 easy patterns for beginners
6. Color textured postcard
Take any sheet of A4 paper and lay it out on the table on a backing or just on film. Wet five more of the same sheets in hot water and crumple. Without waiting for them to dry, put them in a bowl in a warm mixture of PVA and water, and let stand for a while. Take out the wet, wrinkled sheets and carefully stack them on the first blank sheet, spread over the film.
While the paper is still wet, scatter threads, leaves, blades of grass, dried flowers and other small flat decor over the surface in a chaotic manner. Cover everything on top with another layer of plastic wrap and leave it under pressure overnight. In the morning, remove the film and let the future postcard dry completely in the air.
Trim the edges neatly, cover them with tape, lace, or zigzag them on a sewing machine. Apply acrylic paint with sweeping movements with a wide paint brush. You want a slight negligence, not a flawless one hundred percent fill. Decorate the card with bows, ribbons, strings, beads, and at the end write your wishes inside or paste photos.


7. Chocolate girl
A homemade chocolate maker is a simple and effective way to beautifully present the most ordinary chocolate bar. To do this, take a thick sheet of cardboard and transfer the diagram from the photo to it, maintaining the proportions. Use scissors or a non-writing ballpoint pen along all fold lines.
Form a box, glue the pocket on PVA and wrap the future cover. For the inside, cutouts from colored paper are 2 rectangles and a narrow strip for folding. Take decorative corners, lace, ribbons and decor. Paste the inside of the chocolate bar, decorate to your taste and decorate the edges with a beautiful seam or lace.
Outside, glue a thin ribbon-tie and overlay with paper for scrapbooking or decoupage. For volumetric elements, take a volumetric double-sided tape, add the colors of the stamens and beads. Make a small decorative pendant tag for wishes. When the chocolate maker is ready, all that remains is to put the tile inside and tie the ribbon with a beautiful bow.


Amigurumi for beginners: 6 simple schemes step by step
8. Billboard
If it is convenient to store coins in a piggy bank or an ordinary bank, then all paper money is put in envelopes or boxes. But you can make a beautiful and spectacular billboard out of an ordinary sheet of thick cardboard. And for the frame you need only three parts - two rectangles 11.5x21 and one 6x21 cm.
The parts are made separate so that the bill opens easily and beautifully. Connect them together with wide ribbons of thick watercolor paper and mark the fold with scissors or a non-writing pen. On the front side, on double-sided tape, glue a rectangle of padding polyester in size.
From the inside, glue thin ribbons-ties and decorate the front side with blanks. Use pictures, flowers, petals, volumetric details, special decor for scrapbooking. Glue gears, keys, locks, small pendants, beads or any other jewelry on top.
Cover the inside of the cover with scrapbooking paper to hide all the seams and fabric folds. Instead of paper, you can take a thin cotton fabric and stitch a pocket or decorative shreds to it. When everything is assembled, leave the part under pressure for at least a few hours.
Mark the future box on a large watercolor sheet, keeping the proportions from the photo. Glue cardboard bindings to the sides and decorate the bottom and front with scrapbooking paper. When both parts are completely dry, all that remains is to glue the bottom of the box into the bottom of the cover.


