
To decorate the interior, it is not at all necessary to spend fabulous money. You can even create beautiful and graceful jewelry with your own hands. Quivering and delicate butterflies will delight the precious child in the nursery, create a romantic atmosphere in the bedroom or living room. And we will tell you how and from what to make them!
1. Drawn butterflies
You don't need to be a professional artist to paint a spectacular composition of flying butterflies on the wall. Use a stencil, carefully mark the base with a chalk or pencil and slowly transfer the composition. And only then - carefully paint over the contours with ordinary acrylic or glowing fluorescent paint using a thin brush.


2. Butterflies stickers
It's even easier to print ready-made butterflies on a special vinyl canvas or buy ready-made stickers. All you have to do is come up with and plan the composition, and then carefully stick the stickers on the wall. Avoid creases, wrinkles and air bubbles by gently rolling the decals with a roller or any other suitable tool.


3. Paper butterflies
Paper is the easiest and most affordable material, but choose the right weight and thickness. The thinner it is, the more airy and graceful the butterflies will be, fluttering from each gust of wind. But it is much easier to accidentally spoil them, and a crumpled or torn sheet cannot be accurately restored.
More practical and easy to use - origami paper or thick sheets for appliqués. As an alternative - craft or colored paper for children's creativity. Butterflies made of old glossy magazines look spectacular and unusual.
To cut out the same butterflies, make a stencil from cardboard, a thick album sheet, or just print any outline you like from the Internet. To think over the composition and size of future butterflies, cut ordinary rectangles and attach them to the wall. So you will understand how the finished panel will look, especially if you want to combine several shapes and sizes.


How to make a dressing room with your own hands?
4. Butterflies from corrugated paper
Corrugated sheets are very thin and therefore require delicate handling. But they give a feeling of lightness, airiness and volume, which ordinary paper lacks. Such butterflies are easy to make with a baby - you just need to take a rectangle and pull off the middle with glue or threads. Then you can glue the antennae, as well as shape the edges of the wings.


5. Fabric butterflies
A bag with old variegated rags, scraps of ribbons, beads and braid can finally find a new life. The scraps will make great spectacular butterflies that complement textile upholstery and liquid cellulose wallpaper. It is a good choice for Provence, Scandinavian style and other interiors tending to textiles and handicrafts.
The main secret is to process the edges so that they do not crumble or fray. Of course, sewing each butterfly by hand is long and not very beautiful. Just soak the rags in a solution of water with PVA and let them dry well, and only then cut them.


6. Cardboard butterflies
Cardboard does not make such delicate and airy butterflies as thin paper. But on the other hand, it is more durable, it is more difficult to crush and damage it, and it creates volume better. By the way, cardboard can be easily bent and shaped if you gently sprinkle it with water.
Complex openwork wings are best obtained from cardboard. To do this, you need a sharp clerical knife - preferably a new one so as not to break through anything. And then just follow the stencil, making slots and holes. Ready-made butterflies can be painted with gouache or acrylic, covered with sparkles or even decorated with beads.


Volumetric paper snowflake: 8 beautiful DIY ideas (step by step)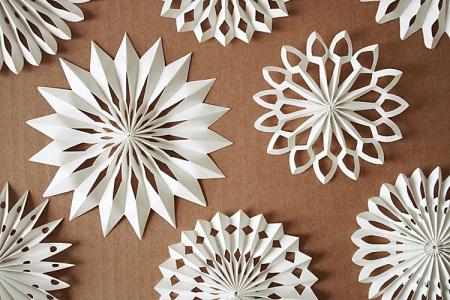
7.Volumetric multilayer butterflies
Complex multi-layered butterflies can be made from several sheets of paper of different weights and colors. To do this, several identical elements are superimposed on each other. Use glue to join or, for ease, sew in the middle with one neat stitch. After that, bend the wings at different angles relative to the center - and now the volumetric butterfly is ready.
To attach the butterflies to the wall, you need a simple double-sided tape cut into small squares. If you plan to leave the decor for a long time, feel free to use PVA glue. Decorative pins are good for thick wallpapers, cork, textiles and other complex substrates.


8. Openwork butterflies on a substrate
This is one of the variations of layered butterflies, for which you will need a denser cardboard base and a light airy openwork top. The base is cut simply along the contour of the stencil, and the upper part is cut with a clerical knife. Contrasting colors or different textures look very unusual: for example, a smooth gray base and silver fishnet wings.


9. Butterflies from polymer clay
A few packs of polymer clay and cookie cutters will make great decorative butterflies. Roll out the plastic and cut out the blanks like gingerbread dough. Make a few small holes in the center so that you can attach the butterflies to the wall later.
Bend the wings in different directions and at different angles, but keep in mind that when they freeze, they will straighten a little. The baking temperature and time are indicated on the polymer clay packaging - follow the manufacturer's instructions. All that remains is to paint the crafts after they are completely dry.


10. Veil of butterflies
Don't want to stain the wall with glue and don't like decor that can't be easily removed? Then a butterfly curtain will suit you, which can be neatly attached to a cornice, shelf, painting or any other base. Cut as many different butterflies as you like, prepare beads and other decorations and string it all on a thin but strong thread - you're done!


